I thought I was doing a good thing by giving my just-turned four-year-old some chores. I’d seen all those lists on Pinterest of jobs that even toddlers should be able to do, so I handed my daughter a toilet bowl brush and told her to get scrubbing. Ok, no I didn’t. I actually got her a cat. But I did ask her to please try to keep it alive by making sure it has food and water and airholes to breathe out of when she’s smothering it with a blanket while playing Mary and Baby Jesus. In addition to the cat, I also taught her how to sort her dirty clothes into my overbearing three-hamper system of white, colors, and darks.
There! I gave my kid some chores! She should be getting more responsible any day now, right?
Wrong.
For some reason, the only guarantee you get when telling a kid they have to do something is a guarantee that you’ll have to tell them to do it again.
Giving my child some of her own chores only added “Remind daughter to do chores” to MY to-do list. It wasn’t what I was hoping for.
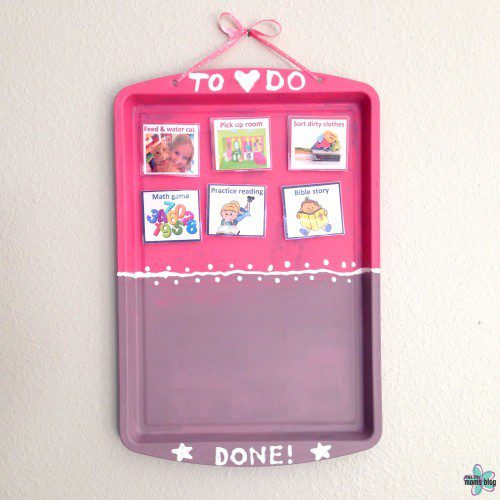
So I decided to be sneaky about it. If I put a little more effort into the front end of things, I just might be able to reap the benefits of less work later. Here’s what I did:
Step One: Find an old pan.
This one had some horrific black stains and scratches on it, so it was perfect for the job. Just make sure it is magnetic! Aluminum pans will not be magnetic like most stainless steel pans are. Houseworks or Stuff Etc. might be good places to look for used pans if you don’t have an extra of your own.
Alternative: Instead of using a pan, you can also paint a flat surface (even directly on your wall!) with magnetic paint. In my experience, it will take several or many coats of paint to achieve good magnetism.
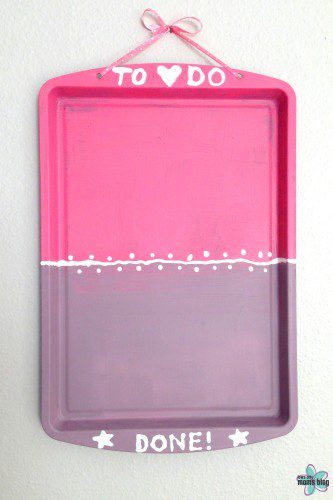
Step Two: Paint your pan.
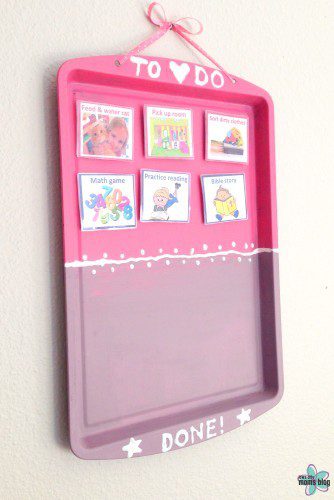
I used acrylic paint, and just slapped it on with a kid’s paintbrush. Don’t use poster paint, tempera, or watercolor, because that won’t stick to a pan. Divide it into two halves, one half for the “To Do” jobs and one half for the “Done” jobs. Pick colors that your kid likes, obviously. My daughter’s favorite colors are pink and “chocolate,” and she loves a good polka dot, so I’m luring her in with those. Come into my lair, child…
Step Three: Add words and details.
I used some white puffy paint to write the words “To Do” and “Done!” on mine. A sharpie or other permanent marker might work just as well. Add some hearts and stars or robots, or whatever else to speak to your kid’s obsessions.
Step Four: Choose the chores.
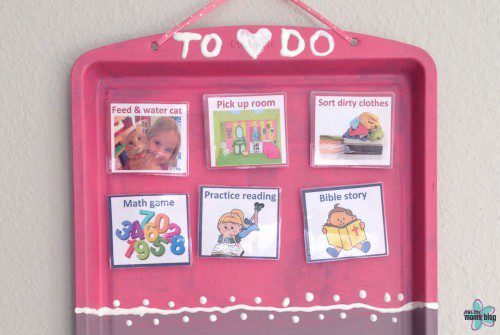
Keep the list short and manageable, and really consider your child’s age and developmental level. You want to pick jobs that they can do without support so that they aren’t left feeling discouraged and helpless. What chores will they be proud of doing? What chores are they capable of accomplishing on their own? Save the tough jobs for the both of you to do together. And don’t be afraid to add some fun ones into the mix, too. Seeing “read a book with Mom” next to “scoop kitty litter” can smooth things over a bit.
Note: You don’t need to assign all of the chores every day. Pick a few that are most important, and the rest can stick to the back of the pan out of sight!
Step Five: Find clipart.
Using real pictures of your own home can be especially helpful to pre-readers, and you’ll certainly win bonus points for that, but I used Microsoft Word clipart for most of mine, and my kid loves those, too. Find pictures that are clear and straightforward, and it doesn’t hurt if they also contain a kid that resembles yours! When choosing pictures, consider how can you make it visually appealing to them. If they like looking at it, they’ll avoid it less than they would a mother holding a toilet brush.
Add simple word descriptions, even if your child is not yet a reader. This is the perfect opportunity to draw attention to words in print in an authentic way.
Step Six: Print and laminate.
Size your clipart to fit your pan (mine were approximately 2 inches square) and print them out. Cut them into individual squares. If you have access to a laminator, get down with your plasticizing self! If you don’t, you could also use packing tape on both sides of each square to sturdy them up.
Step Seven: Add magnets.
I started out by using some super glue to hold the magnets in place, but my magnets were super strong and it took a lot of pulling on the chore card to get them off the pan, so I added a square of packing tape on the back of each one to secure it all together. You can get little magnet “buttons” at most craft stores, and often at supermarkets, too.
Step Eight: Hang it up.
I used a drill with a 3/8” bit to make two holes at the top of my pan, and then strung a piece of pretty polka-dot ribbon through them to make it hangable. You could just as easily glue on some picture hanging brackets or adhesive strips to hang it up. Your choice! Think about where you can hang it where they will see it frequently. The more they see it with their eyes, the less they will need to be reminded about it with your voice.
Step Nine: Unveil!
Make a big deal about sharing the chart with your child and explaining to them how it works. Help them feel proud of being old enough to be trusted with responsibilities.
Step Ten:
Cross off “Remind child to do chores” from your to-do list! At least until tomorrow…
SaveSave






I am so making one!
Yay, Teresa! It was super fun to make, and my daughter is very proud of it. She still may not do every chore every day, but her attitude about it is way better than when I used to just ask her to do things. She likes moving the pictures around, if nothing else! 🙂 Glad you like it!
Just found your blog on Instagram and had to say that this chart is great! I believe you nailed it with the visualization of the chores – kids are better able to remember their tasks if they have a picture to connect to the task. And magnets provide a sensory activity – it’s just fun moving stuff around, you can hear it and feel it stick. It’s also why marble jars work so well as a “point system” to reward good behavior.
This is such a great chore chart for the kids! I am wanting to makes something similar for the new year. I think I will definitely have to include daily teeth brushing on there to get them ready for the pediatric dentist. Thanks so much for sharing.