I’ve been waiting all winter for spring to arrive and it’s FINALLY here! Yipee! That means warmer temps, outside play, fresh air, and open windows. It also means SPRING CLEANING and ORGANIZING.
Some of you might get a little tickle down your spine when you think about spring cleaning; others might try to avoid it like the plague! I tend to fall somewhere in the middle. Generally I’m a fairly organized person (my home office is not a good example of this) and I usually get the itch to get some aspect of my life or home organized when spring rolls around.
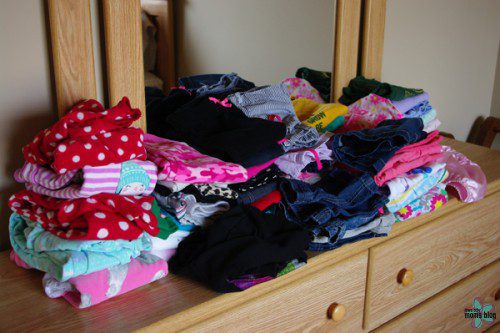
One of the recent organization projects I tackled was all the baby and kid clothes I have stored in various places around my house. Not to mention all of last year’s clothes still taking up residence in my daughter’s closet and drawers.
The change in seasons is a great time to go through everything and keep what fits, save what is savable, and toss what really should never be worn again!
The first thing I did was to re-organize all the baby clothes I’ve been saving since (what feels like) the beginning of time! I started out strong and had a great system in place for neatly storing and organizing all the infant clothes I had. But then baby went from a non-mobile, lay-on-the-floor, and sleep-all-day infant to a rambunctious toddler who’s starting to outgrow the one nap she takes each day and who needs to help mommy with EVERYTHING. In other words, I no longer had long periods of uninterrupted organizing time where I could sit in peace with piles of neatly folded clothes laying in rows on my floor.
As my three-year-old daughter quickly outgrew her clothes, I quickly tossed them into piles in our spare closet with the plan of organizing them neatly and storing them away for the arrival of baby number two in the future. Well, baby number two was on the way, just not for me! My sister was having her second daughter and needed some of the clothes I had saved, some of which originally came from her and her first daughter.
So I set out to really get organized and pick up where I left off! I’m pleased to announce that most of our baby clothes are now nicely organized and packed away (or given to my sister). Here are some ideas for organizing baby clothes and what to do moving forward.
10 Tips for Organizing Baby Clothes
1. Clean Clothes
It’s best to make sure the clothes have been washed prior to storing them. That way you won’t end up with strange smells or odd spots on the clothes when you open them up again in the future!
2. Group clothes by size and type
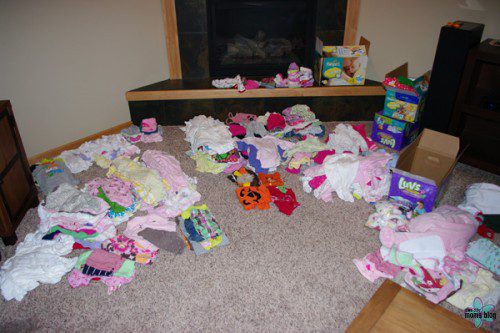
If you’re starting from scratch and haven’t done any organizing yet, then gather all the clothes in one room and start laying them out in piles. Put each size in a different area of the floor and separate each size into like items (e.g., onesies, pants, t-shirts). If you have multi-piece outfits, try to keep the pieces together – fold bloomers and leggings inside the dress or shirt so they get packed up together.
3. Weed
As you’re organizing the clothes by size, take a little time to look through the items and weed out the things you don’t need. It will save you time looking through the clothes in the future. Is there an outfit your kid just never wore? Are there items that have seen better days and are full of stains? Don’t spend your time packing up items that don’t need to be saved. Donate new, unworn, and gently-used clothes to charity or a friend. Throw out the items with holes and stains now, so you don’t have to do it later.
4. Fold
This might go without saying, but fold everything neatly. You can fit more clothes in each box or bin if they are neatly folded. I folded everything first, then proceeded to pack them away.
5. Storage Bags
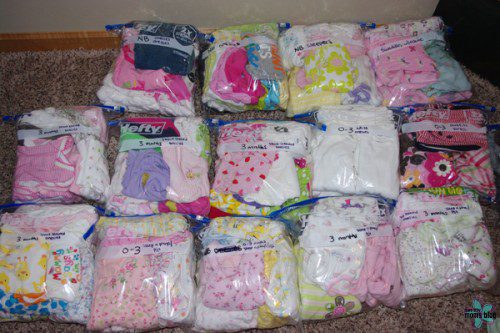
For the smaller sizes (i.e., newborn, 0-3 months, 3-6 months), I put everything into gallon storage bags (the ones with the zipper closure) before boxing them up. This is especially handy if you plan to use large tubs. It keeps the small items together; plus you can write directly on the bag to indicate what the contents are. And you’ll be surprised how much can actually fit in just a single gallon bag! I crammed mine as full as possible. Don’t worry about wrinkling, you’ll probably want to wash everything again before the next kid wears it!
6. Bins and Boxes
Plastic bins and tubs are great if you already have them, but you don’t need to spend lots of money on buying new ones. I had a few extra-large bins sitting empty from our last move, so I started with those and ended up using them mostly for overstock diapers and maternity clothes.
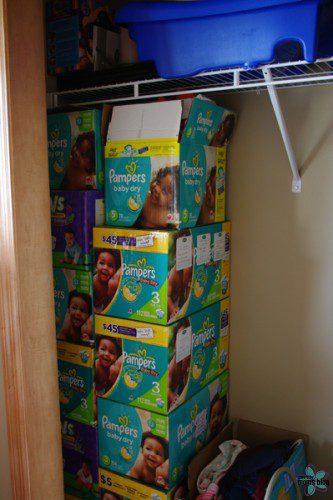
If you don’t already have bins, save all those diaper boxes that have a tendency of piling up. I actually prefer the diaper boxes to the bins because they are “free” and they don’t get as heavy when full. It might take more boxes to contain everything than using the largest bin you can find, but those diaper boxes have a great way of fitting perfectly in an empty closet or on a shelving unit.
No matter what you use, try to keep things uniform for easier stacking!
When packing up your boxes/bins, try to only put one size of clothes in each box when possible. If you don’t have enough of one size to fill a box, then add in the next chronological size to the box.
7. Labels
Label EVERYTHING! If you employ the storage bag method, use a Sharpie to write on the outside of the bag. If they are freezer bags, they will have a nice white space intended for labeling. Also, label the outside of all boxes and bins.
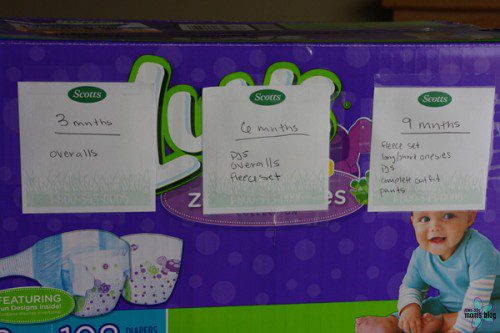
As I was packing up my boxes, I made a list on a post-it note of everything I put in the box. Later I re-wrote it neatly on a small piece of paper and taped it to the outside of the box. This will be super helpful when it comes time to finding items later on!
My labels usually consist of the size(s) and type(s) of clothes contained in the box.
Once you’ve gone through all the clothes you already had lying around, it’s time to tackle last year’s clothes taking up space in your child’s closet and drawers to make room for new styles and sizes!
8. Try everything on!
Before rushing out to buy a new spring wardrobe, go through the closet and drawers and pull out all the items you’re not sure will fit. Make a pile and try them on your child. Keep the ones that fit well enough to make it through another spring/summer, and set aside the items you want to store, donate, and discard.
9. Staging Area
If possible, find a place to use as a staging area. We have a spare bedroom so I take advantage of this generally clutter-free room to organize my daughter’s clothes. I use the staging area to accumulate and gather all the outgrown clothes as I come across them.
I tend to wait until summer to actually start boxing up clothes so I have a better chance of keeping sizes together. Nothing irritates me more than taping up a box and the next day seeing something in the laundry that should have been in the box!
If you don’t have a space in your house to use as a staging area, you can always toss the clothes in an empty box tucked in a closet or storage room. (I’ve done this plenty of times too.)
10. Organize in spurts
Once you have your organizing under control, go about the remainder in spurts. If you’re using a staging area, take a few minutes one day to get everything folded. Come back a day or two later and group everything by size and/or type. Once you have some extra boxes, you can start filling them and labeling. It’s much easier to keep up with once you have it all under control!
Happy Organizing!


