I am a Christmas geek. I’m one of “those people” whom most roll their eyes at. I’m the type that switches over to holiday radio and decorates her tree the second Thanksgiving is passed. Some years I’ve put the tree up on Thanksgiving and other years my heart aches to drag out my bins of Christmas stuff so badly that I can’t even wait until we’ve stuffed the bird, let alone carved it. I shed tears of joy walking through aisles of the holiday décor selection at the local craft stores. Last year, I may or may not have worn a Santa t-shirt well into spring, and I may or may not have given that same shirt a huge hug before packing it away for the summer.
I LOVE CHRISTMAS!
As I wander through those décor selections, I grow a little disheartened each time I turn over a price tag. I mean, all the stuff is SO cute, but boy, can it be expensive! Maybe it’s not even expensive. Forty dollars for a light up marquee sign does seem like a pretty good deal actually, but that’s a gift for someone on my nice list. So, what’s a Christmas crazed girl to do?! Well, craft, of course! I have compiled a little list of Holiday craft projects that are simple, (somewhat) fun, and easy on the budget, with most projects costing $10 or less! Yes, you read that right! Time to deck the halls!
TREE TRIMMINGS
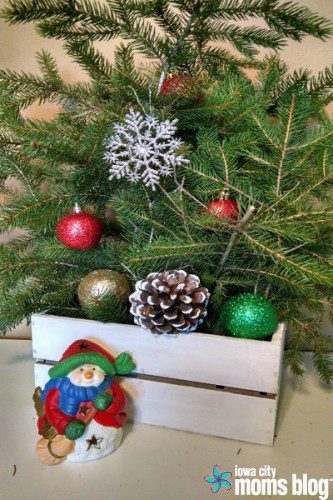
Trimmings from a pine or fir tree are such a simple and cost effective way to pack a lot of punch! Arrange the clippings in colored jars, ceramic planters, or any other container you have on hand, and add a couple of pinecones or a few dollar store ornaments to make them feel more festive. Or you can tie the trimmings together in a garland or to hang on your front door. I cut mine off a tree in our yard, but most places that sell fresh cut Christmas trees will give or sell you the trimmings for next to nothing. This project cost me $3.
FAUX CHALKBOARD COUNTDOWN
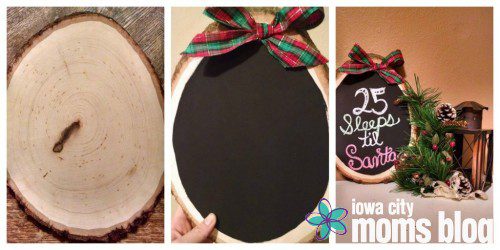
I (and just about everyone else) LOVE the chalkboard trend! It’s fun and cute. What’s more fun than chalkboard everything is counting down the days until Christmas! I have bought the quart size of chalkboard paint before and that stuff is well worth the price if you’re painting furniture, but if you’re looking for a cheaper way to make a fun sign without much planning, I have a secret…acrylic paint! Chalk shows up on just about anything–you mamas already know this–and craft paint is no different! You can find the little tree chunk at Hobby Lobby. Don’t forget your 40% off coupon! Paint a large oval on the tree chunk, glue a little bow on top, and ta-da! This sweet faux chalkboard countdown cost $6.50.
TREAT BAG WALL ART
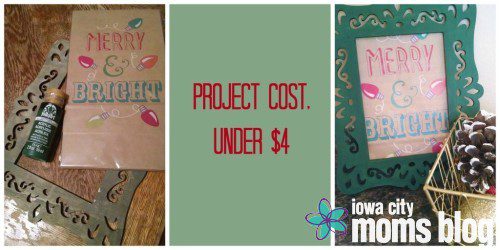
For this craft, I used an unfinished wooden frame that I bought at Michael’s last year to make a Halloween decoration. It had old gray paint on it, so I added a new coat of a forest green color. I fell in love with the graphic on these treat bags and picked them up for $1.00. I cut them to fit the frame and taped them on with masking tape. I plan to add a cardboard backing to prevent the paper from tearing. If I had a photo frame the correct size on hand, I would have used it instead. This treat bag art cost $3.70.
JOY WALL ART + SNOWFLAKE GARLAND
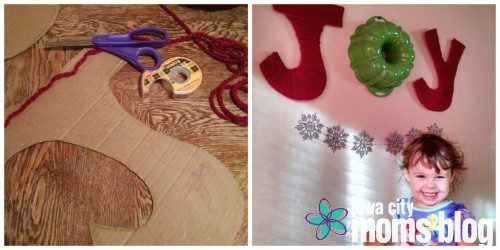
We have a large, empty wall behind our kitchen table. I really wanted something to help fill out that space. I got the idea to use a green bundt pan as an O to spell joy. At first, I planned to just buy craft letters and paint them, but we’re talking $9 or $10 a piece for the size that I wanted. Yikes! I pulled an empty diaper box out of our recycle pile and cut the letters J and Y out of it. I found a thicker, deep red yarn at the craft store to wrap around the cardboard letters. I like the way this made the edges look more finished, as opposed to simply painting it. Originally, the plan was to only use double -sided tape, but hot glue seemed to work better when getting the corners and curves to sit well. Wal-mart had a 20 count pack of glittering snowflakes for $3. To make the garland, I tied six of them together using their existing strings and tacked them to the wall. I might use the rest to make a longer garland for a different spot in the house or hang the snowflakes on the tree! If you don’t have a green bundt pan (understandable), perhaps an old holiday album on vinyl could also work? I cannot wait to eat Christmas breakfast with my daughter smiling in front of this backdrop! This project cost me $11.
DIY GIFT TAGS (FROM LAST YEARS CHRISTMAS CARDS)
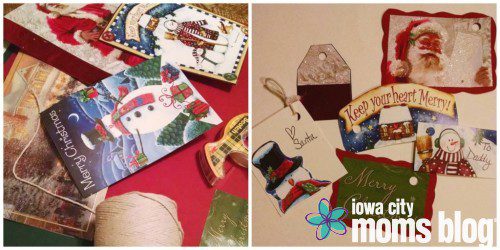
I love Christmas cards! The sentiment is so sweet. I love hearing from old friends and far away family members. Checking the mail in December is so exciting! I display the cards we receive on a ribbon line and clip them with clothespins. They serve as nice reminders of the people we love, and when all the seasonal decor comes down, I can’t bear to toss them out. I have stacks of them from years past. I wanted to bring them back out this year and give them a new life. I have a couple I will hang in frames, but I turned the others into gift tags! I cut out pictures or words that I liked and taped them to solid colored scrapbook paper using double-sided tape. Then, I punched a hole in the corner so they can be tied to a package with ribbon.
UPDATE OLD OR HAND-ME-DOWN ORNAMENTS
If you have Christmas bulbs that you’ve grown tired of or that someone offered you and you just took them because you can’t say no to free Christmas stuff (I’ve never had that happen to me, by the way ;D), but you want to update them, you can! Here are a few ways: firstly, take an old shirt and wrap it up around some bulbs. Then, tie a rubberband around the top to secure it and trim off the excess fabric. You can dress it up by tying a pretty ribbon or a piece of yarn around the rubber band. Loop your ornament hook through the rubber band to hang!
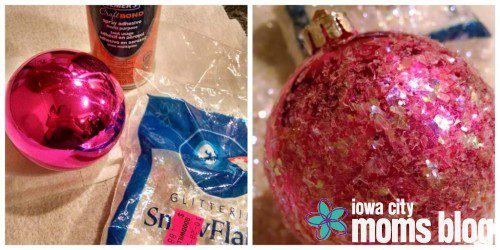
Ornament have a scratch? No problem! Glitter fixes everything! I picked up some glittering snowflake confetti at Goodwill (you can find it in just about any Christmas section). I then misted the bulb with spray adhesive and sprinkled on the artificial snow. I quickly gave it a pat down to adhere everything and shook off the excess flakes. Tip: wear disposable gloves if you have them and completely cover everything before using the spray adhesive. It’s easy and effective, but messy!
Growing up, my sister and I always helped my mom make decorations and ornaments for the tree! It is a tradition I really want to carry on with my daughter, so I love the idea of letting her get involved! My cousin had given me clear glass bulbs a while ago because she didn’t want them. We sat down with a bowl of Elmer’s glue, a paintbrush and a small dish of glitter. I let my daughter paint glue on the ornament and then dip it in the glitter or sprinkle it on. I gave her one bulb at time and helped her hold them if she got too wiggly. If you have plastic or shatterproof bulbs to use, that would be my first choice for little hands!
 FINAL TIPS
- Shop the clearance aisles, you may find something unexpected!
- If you’re not feeling crafty, check out thrift stores for already made decor at a nice discount!
- Use what you have! I can’t stress this one enough. Check your recycle bin, your junk drawer, the back of your closets–there is stuff you’re not using, but could be! Trust me. You’d be amazed what a perfect ornament a peanut butter jar lid and your baby’s handprint can make!
Alright, I’m done talking your elf ears off now! I will admit that I had to try really hard to narrow this list down, so if anyone needs more ideas, please do not hesitate to ask! I hope you all get to enjoy a wonderful holiday making memories with your families!
Merry Christmas, Mamas!


